
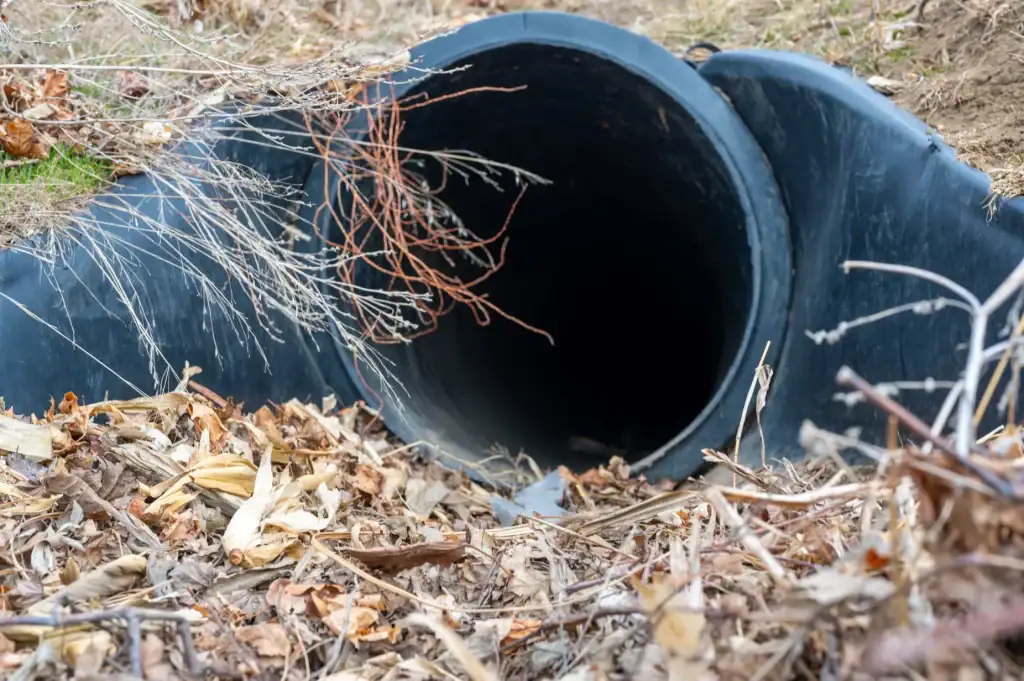
Driveway culvert installation in Anchorage is often necessary when a driveway crosses a ditch, drainage path, roadside swale, or low area where water must continue to flow.
Without a culvert, water can collect near the driveway, wash out gravel, soften the base, flood low areas, or block natural drainage. Over time, that can damage the driveway and create problems for the surrounding property.
A culvert helps water pass under the driveway rather than flow over it.
That sounds simple, but proper installation takes planning. The pipe needs to be the right size, placed at the right slope, bedded correctly, covered with the right material, and tied into the surrounding grade. If the culvert is too small, too shallow, poorly aligned, or badly backfilled, it may clog, collapse, freeze, or cause water to back up.
For Anchorage homeowners, culvert work also needs to account for snowmelt, freeze-thaw cycles, ditch flow, driveway traffic, soil conditions, and access needs.
That is why driveway culvert installation should be treated as a drainage and excavation project, not just a pipe placement job.
What Is a Driveway Culvert?
A driveway culvert is a pipe or drainage structure installed beneath a driveway to allow water to pass through.
Most residential driveway culverts are placed where the driveway crosses a ditch or drainage channel. The driveway surface sits above the culvert, while water flows through the pipe underneath.
The culvert may be made from corrugated metal, plastic, reinforced pipe, or another approved material, depending on the site and project requirements. The best choice depends on expected water flow, cover depth, vehicle loads, soil conditions, and installation location.
A culvert has a few key parts.
The inlet is where water enters the pipe. The outlet is where water exits. The pipe barrel carries the water through. Bedding supports the pipe from below. Backfill surrounds and protects the pipe. The driveway surface sits above the finished structure.
When all of these parts work together, the culvert helps preserve the driveway and keeps drainage moving across the property.
When they are installed poorly, problems can show up quickly.
When Do You Need a Driveway Culvert?
You may need a driveway culvert if your driveway crosses a ditch, swale, seasonal drainage path, or low area where water naturally moves.
One common sign is water running over the driveway after rain or snowmelt. If water crosses the driveway rather than running under it, the driveway surface may erode or develop ruts.
Another sign is standing water near the driveway entrance. If the driveway blocks a ditch or low area, water can pool on one side, softening the soil. This can make the driveway unstable, muddy, or difficult to maintain.
A culvert may also be needed when building a new driveway from a road to a home, garage, shop, or parking area. If the access point crosses a drainage path, the driveway should not block water movement.
Existing driveways may also need culvert replacement. Older culverts can rust, crush, clog, settle, or become too small for current drainage conditions.
If your driveway entrance keeps washing out, holding water, or freezing into a thick ice patch, the issue may be poor drainage. A culvert may be part of the solution.
Why Culverts Matter for Anchorage Properties
Anchorage properties can face demanding drainage conditions.
Snow can build up through the winter. When temperatures rise, meltwater needs somewhere to go. If the driveway blocks that flow, water can pool, refreeze, erode soil, or damage the driveway base.
Freeze-thaw cycles are another concern. Water trapped around a culvert or driveway base can freeze, expand, and weaken the surrounding material. Over time, that can lead to sinking, heaving, potholes, and uneven driveway surfaces.
Spring runoff can also create problems. A ditch that looks dry during part of the year may carry a lot of water during the melt season. If a driveway is built without sufficient drainage capacity, water may cut around it or wash out the edges.
For gravel driveways, poor drainage can be especially damaging. Water can move gravel, expose soft soil, and create deep ruts. For paved driveways, trapped water can weaken the base, leading to cracking or edge failure.
A properly installed culvert helps protect both the driveway and the surrounding drainage pattern.
Permits and Local Requirements
Driveway culvert installation may require approval, depending on the location of the work.
If the culvert is part of a driveway connection within a public right-of-way, the work may need to comply with driveway standards and permit requirements. This matters because a driveway culvert can affect more than one property.
If it blocks or redirects drainage, it may cause problems for a road, a ditch, a neighboring lot, or a public drainage system.
Permit requirements can depend on whether the driveway connects to a local road, a state road, a private road, or an internal property access. The size and location of the culvert may also affect requirements.
Homeowners should not assume that any pipe can be placed anywhere. The pipe size, slope, location, and end treatment may need to be matched to the drainage conditions and applicable standards.
Before excavation begins, the project should be checked for right-of-way limits, utility conflicts, drainage patterns, and required approvals.
Common Signs Your Existing Culvert Is Failing
A driveway culvert can fail slowly over time.
One sign is water backing up at the inlet. If water collects on one side of the driveway, the culvert may be clogged, undersized, crushed, or set too high.
Another sign is erosion around the pipe ends. If water cuts around the culvert rather than flowing through it, the inlet or outlet may need repair, protection, or improved grading.
A sinking driveway above the culvert can point to poor backfill, pipe collapse, or soil movement. This can become a serious issue if vehicles regularly drive over the weak area.
Rust, cracks, separation, or crushed sections are also warning signs. Older metal culverts may corrode. Plastic culverts can deform if they lack sufficient cover or proper backfill.
Ice buildup can also suggest drainage problems. Some winter ice is expected in cold climates, but repeated thick ice near the driveway entrance may indicate that water is not moving properly.
If the driveway washes out after heavy runoff or spring melt, the culvert may not be handling the flow.
How Driveway Culvert Installation Works
Driveway culvert installation starts with understanding where the water comes from and where it needs to go.
The contractor reviews the site, ditch line, driveway location, slope, soil conditions, and access needs. The goal is to place the culvert so that water can continue to flow through the drainage path without damaging the driveway.
Next, the correct culvert location is marked. The pipe should align with the natural or planned drainage channel. Poor alignment can cause water to strike the pipe at the wrong angle, increasing the risk of erosion or clogging.
Excavation follows. A trench is dug across the driveway path or driveway entrance. The trench must be deep enough for the pipe, bedding, cover material, and finished driving surface.
The base is then prepared. Culverts need stable bedding so the pipe is evenly supported. If the pipe rests on rocks, soft soil, or uneven ground, it may settle or deform.
After bedding is prepared, the pipe is placed at the correct slope. Water should flow smoothly from inlet to outlet. Too little slope can cause standing water and sediment buildup. Too much slope can cause erosion at the outlet.
The pipe is then backfilled carefully. Backfill should be placed and compacted in layers to support the pipe on both sides. Dumping large amounts of material on top without side support can damage the pipe or cause it to settle.
Once the culvert is covered, the driveway surface is built or restored. Final grading shapes the area so water enters and exits the culvert properly.
Choosing the Right Culvert Size
Culvert size is one of the most important decisions in the project.
A pipe that is too small can clog or cause water to back up. A pipe that is too large may cost more than necessary and require more excavation and greater cover depth.
The right size depends on the drainage area, ditch depth, expected flow, slope, soil, and whether debris is likely to enter the pipe. A driveway culvert near a small roadside ditch may need a different size than one carrying water from a larger uphill area.
For a residential driveway, the goal is to choose a pipe that can handle normal and seasonal flow without creating a bottleneck.
Homeowners should avoid guessing. A culvert that looks large enough during dry weather may be too small during spring melt.
Culvert Material Options
The material used for a driveway culvert should match the site conditions and expected traffic.
Corrugated metal pipe is commonly used for drainage applications. It can be strong, but it may corrode over time depending on soil, water, and exposure conditions.
Plastic culvert pipe can be lighter and easier to handle. Some plastic pipes resist corrosion well, but they still need proper bedding, cover, and backfill to avoid deformation.
Concrete pipe may be used in certain drainage situations, though it is heavier and often requires more equipment for placement.
The best material is not always the cheapest pipe. The pipe must withstand vehicle loads, soil pressure, water movement, and seasonal conditions. It also has to be installed correctly.
Even a strong pipe can fail if the bedding is poor or if there is not enough cover above it.
Bedding, Backfill, and Cover Depth
Bedding and backfill are what help the culvert hold its shape and stay in place.
The bedding layer supports the bottom of the pipe. It should be stable, properly shaped, and free of large rocks or sharp points that could damage the culvert.
Backfill supports the pipe’s sides and top. It should be placed evenly on both sides so the pipe is not pushed out of alignment. Compaction should be done carefully to reduce settling without damaging the pipe.
Cover depth is also important. The pipe needs enough material above it to protect it from vehicle loads. If the cover is too shallow, the pipe may crush, bend, or move.
If the driveway carries heavy trucks, trailers, delivery vehicles, or equipment, the installation may need stronger cover and better compaction.
A culvert is not protected by the pipe alone. It is protected by the full installation: bedding, side support, cover, compaction, and final surface.
Grading Around the Culvert
Grading controls how water reaches and leaves the culvert.
The inlet area should direct water into the pipe rather than allowing it to spread across the driveway. If water bypasses the inlet, it can erode the driveway edge.
The outlet should allow water to leave without cutting into the soil. Depending on the flow, the outlet may need rock protection or shaping to reduce erosion.
The driveway surface should also be graded correctly. Water should not sit on the driveway or flow onto the driving surface if it can be directed into the drainage system.
Poor grading can cause a good pipe to perform poorly. If the surrounding ground is too high, too low, or sloped the wrong way, water may not enter the culvert properly.
Excavate Alaska’s drainage and grading services can help create a better path for water around driveways, culverts, and low areas.
Driveway Culvert Installation for Gravel Driveways
Gravel driveways need special attention around culverts.
If water moves across a gravel driveway, it can carry surface material away. This can create ruts, exposed base, and soft spots. A culvert helps reduce this by allowing water to cross underneath the driveway.
The driveway above the culvert needs a strong base. Gravel should be properly placed and compacted so that vehicles do not create dips over the pipe.
Edges are also important. If the driveway shoulders are weak, water can erode around the culvert ends. This may cause the pipe to become exposed or the driveway entrance to narrow over time.
For gravel driveways in Anchorage, snow removal should also be considered. A poorly shaped culvert area can catch plow edges, cause gravel loss, or create uneven transitions.
A clean transition from the road or property access to the driveway helps improve both drainage and daily use.
Driveway Culvert Replacement
Sometimes the best option is to replace an old culvert rather than repair it.
Replacement may be needed if the pipe is crushed, rusted through, badly clogged, too small, or set at the wrong elevation. If the driveway above the pipe continues to sink, the old culvert may no longer have adequate support.
Replacement usually involves removing driveway material over the culvert, excavating around the old pipe, pulling it out, reshaping the trench, installing the new pipe, backfilling, compacting, and restoring the driveway surface.
This is also a good time to correct the problems that caused the old culvert to fail. If the original pipe was too small, the replacement may need a different size. If erosion damaged the outlet, the new installation may need better outlet protection. If the pipe clogs often, the inlet may need reshaping.
Replacing the pipe without fixing the surrounding drainage issue may lead to the same problem again.
Cost Factors for Driveway Culvert Installation in Anchorage
The cost of driveway culvert installation in Anchorage depends on several factors.
The pipe size and length matter. A longer driveway crossing needs more pipe, more excavation, more bedding, and more backfill.
Depth also matters. A deeper culvert may require more digging and more material. A shallow culvert may need special attention to ensure enough cover for vehicle loads.
Soil conditions can change the cost. Soft, wet, rocky, or unstable soil can take more time to excavate and prepare. If the area has poor drainage, extra grading or stabilization may be needed.
Access affects labor. An open driveway entrance is usually easier to work on than a tight area with trees, fences, utilities, steep slopes, or limited space for equipment.
Drainage complexity can also raise costs. If the culvert is part of a larger water problem, the project may need ditch shaping, swales, erosion control, or additional grading.
Replacement projects may cost more than simple new installations because old pipe, compacted driveway material, and damaged areas may need to be removed.
Utility Checks and Site Safety
Before digging for a driveway culvert, utilities should be considered.
Driveway entrances and roadside areas may contain buried lines, drainage structures, or other hidden features. Digging without checking can create safety risks and expensive damage.
The work area should also be prepared for equipment. Vehicles, trailers, landscaping items, and other obstacles may need to be moved. If the driveway is the only access to the home, homeowners should plan around a temporary disruption.
Open trenches should not be left unprotected. Culvert installation involves excavation, heavy pipe or material, and moving equipment.
A safe project depends on planning, careful digging, and clear access.
How to Maintain a Driveway Culvert
A culvert needs periodic maintenance to keep working.
The inlet and outlet should be checked for leaves, sediment, gravel, ice, and debris. If the ends are blocked, water may back up and damage the driveway.
After heavy rain or spring melt, homeowners should look for signs of erosion. Soil cutting around the pipe ends should be corrected before it gets worse.
Gravel should not be allowed to slide into the culvert opening. If driveway material keeps washing toward the inlet, grading may need adjustment.
In winter, snow and ice can block drainage. When thawing begins, water needs a clear path through the pipe.
If the culvert repeatedly clogs, the problem may be pipe size, poor alignment, a bad inlet shape, or too much sediment entering from uphill. In that case, cleaning alone may not solve the issue.
Why Professional Installation Matters
Driveway culvert installation may look simple, but the details matter.
A pipe set slightly too high can cause water to back up. A pipe set too low may collect sediment. A pipe without proper bedding can settle. A pipe with poor backfill can deform. A driveway surface without good grading can still wash out.
Professional installation helps ensure the culvert is placed correctly, properly supported, and tied into the surrounding drainage.
This is especially important in Anchorage because winter conditions can quickly expose weak installations. If water cannot drain during thaw periods, driveway damage can occur quickly.
A properly installed culvert protects the driveway, supports access, and helps maintain the intended drainage path.
Working With Excavate Alaska
Excavate Alaska can help homeowners with driveway culvert installation in Anchorage, including excavation, drainage planning, grading, trenching, and site preparation.
A culvert installation often connects several types of site work. It may involve shaping a ditch, building or repairing a driveway entrance, improving drainage, stabilizing the driving surface, and restoring the area after installation.
Excavate Alaska can review the property, look at how water moves, and help prepare the site so the culvert can do its job.
For homeowners dealing with driveway washouts, standing water, poor access, or a damaged existing culvert, the right excavation and grading work can make a major difference.
Driveway culvert installation in Anchorage is important when a driveway crosses a ditch, swale, runoff path, or low area where water needs to keep moving.
A good culvert helps protect the driveway from washouts, soft spots, erosion, pooling water, and seasonal drainage problems. But the pipe alone is not enough. The installation needs proper sizing, slope, bedding, backfill, compaction, cover depth, and final grading.
Homeowners should also consider permit needs, right-of-way rules, utility locations, drainage patterns, and long-term maintenance before starting.
When installed correctly, a driveway culvert can support reliable access and better drainage through changing Anchorage conditions.
FAQs
When do I need driveway culvert installation in Anchorage?
You may need a driveway culvert if your driveway crosses a ditch, swale, low area, or drainage path. A culvert may also be needed if water runs over your driveway, pools near the entrance, or washes out gravel during runoff.
How long does driveway culvert installation take?
The timeline depends on the driveway size, pipe length, excavation depth, site access, soil conditions, and drainage work needed. A simple installation may be quicker, while replacement or more difficult drainage work can take longer.
What size culvert do I need for my driveway?
The correct culvert size depends on expected water flow, ditch depth, drainage area, slope, and site conditions. It should not be guessed solely from appearance in dry weather.
Can an old driveway culvert be replaced?
Yes. A damaged, crushed, rusted, clogged, or undersized culvert can often be replaced. The replacement should also correct the drainage or grading issue that caused the original problem.
Can Excavate Alaska help with installing a driveway culvert?
Yes. Excavate Alaska can help with excavation, trenching, drainage preparation, grading, culvert placement, backfill, and driveway surface restoration for properties in Anchorage.

As the owner and founder of Excavate Alaska, I’m passionate about delivering reliable, high-quality excavation services to the Anchorage community and beyond. With over a decade of hands-on experience in the industry, I’ve built Excavate Alaska on the values of integrity, professionalism, and customer-first service. My team and I specialize in site preparation, land clearing, grading, trench digging, and full-scale excavation for both residential and commercial projects.