
The homeowner’s goal: read the plan, protect the schedule
A septic design is a roadmap for excavation, pipe slopes, setbacks, and inspections. Understanding the tanks, tees, baffles, and lines on your drawing helps you ask more thoughtful questions and avoid rework in Anchorage’s short construction season. When it’s time to dig, tight coordination between design and field work keeps everything moving. See Excavation Solutions for how the digging phase is sequenced on real jobs.
What you’re looking at: the quick legend
Most residential septic plans include:
- Plan view (overhead map) showing house, tank, drain field, and setbacks
- Profiles/sections showing tank depths and pipe slopes
- Notes/schedules listing materials, tank volume, fittings, and inspection points
- Contours/elevations to confirm gravity flow and finished grades
Find the north arrow, the scale, and the benchmark elevation first. Those three cues anchor everything else.
Tanks 101: size, depth, and access points
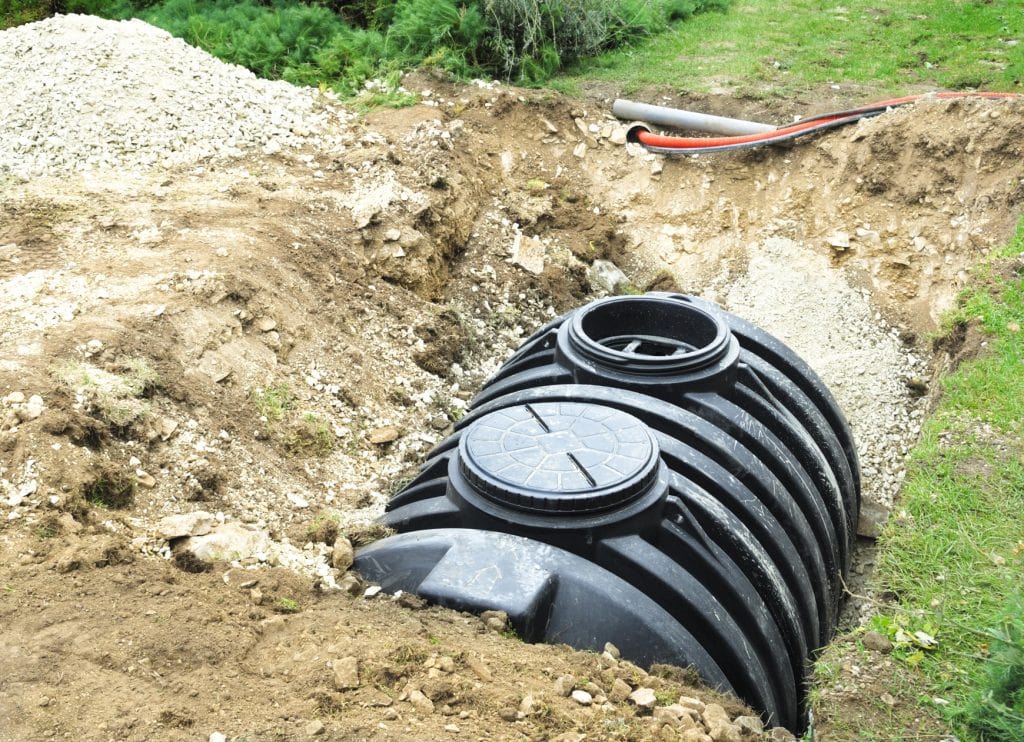
Your tank is sized for household flow and shown as a rectangle or oval with inlet/outlet ends labeled.
- Capacity & material: often called out in notes (e.g., 1,000–1,500 gal).
- Risers & lids: the plan should show access for inspection and pumping—critical in winter climates.
- Inlet elevation vs. outlet elevation: the outlet should be lower to maintain flow to the drain field.
- Setbacks: tanks must be set back from property lines, wells, streams, and structures.
Pro tip: Confirm riser heights against finished grade so lids aren’t buried after Land Grading.
Tees and baffles: quiet heroes that keep solids in the tank
Designs usually specify inlet and outlet tees (or baffles) to control flow:
- Inlet tee/baffle: slows incoming wastewater, reducing turbulence.
- Outlet tee/baffle: skims clear effluent from the upper layer and blocks floating scum from leaving the tank.
- Screen at outlet (if specified): adds a second layer of protection for the field; include a service plan to clean it.
If your plan calls out “outlet filter” or “effluent screen,” make sure it’s accessible through a riser for maintenance.
Lines, slopes, and fittings: where inspections focus
Septic success rides on slope and bedding:
- House to tank line (building sewer): typically a steady minimum slope to prevent clogs while avoiding too-fast velocities.
- Tank-to-field (effluent line): follows the design slopes to distribute flow evenly.
- Fittings: long-sweep bends, cleanouts at direction changes, and sleeves where lines pass through foundations or walls.
- Bedding & backfill: uniform, compacted bedding protects pipe grade. See Trench Digging for safe depths and compaction.
Inspectors often check pipe slope, bedding quality, and tee orientation—details you can confirm on the drawing before work begins.
Gravity vs. pump: read the arrows (and the elevations)
If the design arrows show rising elevations from tank to field—or if the field sits higher than the tank—you may have a pump/pressure system:
- Pump tank: an additional chamber with a pump, floats, and an alarm.
- Pressure manifold/lines: smaller-diameter pipe with orifices; the plan specifies hole size and spacing.
- Dose volume & controls: listed in the notes; your contractor tests and documents this at start-up.
Anchorage installs often prefer gravity where the lot allows, but pressure systems solve elevation and soil constraints when needed.
Drain field basics: trenches, beds, or chambers
Your plan will label the field type and layout:
- Trench or bed dimensions (width, length, spacing)
- Stone or chamber media and fabric callouts for keeping fines out
- Distribution box (D-box) or manifold location for even flow
- Reserve area (a backup footprint the design sets aside for future use)
Confirm the field footprint against trees, slopes, and drive aisles in your yard plan. If heavy traffic must cross nearby, consider Slope Stabilization or route vehicles elsewhere.
Setbacks and “no-go” zones you’ll see on the plan
Designs mark minimum distances from features such as:
- Property lines and buildings
- Wells and water bodies
- Steep slopes or banks
- Utility easements
These keep your system safe and compliant—and they protect neighbors. If your landscape plan adds patios or walls later, keep them clear of the field and its inspection ports.
Venting, cleanouts, and inspection ports
Look for:
- Cleanouts on long runs or at bends for maintenance access
- Inspection ports at the field ends to check performance
- Vents (if specified) to release air from pressure systems or long gravity runs
Make sure these are mapped and visible after Land Preparation so they aren’t lost under sod.
Materials, bedding, and backfill notes that matter
Your drawing’s notes will call out:
- Pipe type and rating (e.g., SDR-35 PVC)
- Bedding material and depth (uniform sand or stone)
- Fabric over stone or chamber systems
- Backfill compaction guidance to prevent settlement over lines and tanks
Field crews follow the notes; homeowners protect these details by avoiding heavy traffic in newly dug trenches and by scheduling work during Anchorage’s stable weather windows.
Grading and drainage: protect the system you just built
A great septic can fail early if surface water floods it. Your plan should work hand-in-hand with Drainage Solutions:
- Maintain a positive slope away from the tank and field
- Keep roof runoff off the field—use downspout extensions and swales
- Avoid confining water with new concrete sidewalks pitched toward the system; see Concrete Sidewalks for correct subgrade and slope
A simple read-through checklist (print this)
- Find scale, north arrow, benchmark elevation
- Verify tank size, inlet/outlet elevations, riser heights
- Confirm tees/baffles (and outlet filter, if noted)
- Trace line routes, slopes, cleanouts, and fittings
- Identify field layout, D-box/manifold, media, fabric
- Mark setbacks and reserve area on your yard plan
- Note inspection points; plan access after grading
- Review bedding/backfill notes and traffic limits
- Align surface drainage to protect the tank and the field
Common red flags to catch early
- Missing risers to finished grade (future maintenance headache)
- Flat or back-pitched runs that invite clogs
- No access for future pumping due to fences or landscaping
- Downspouts discharging toward the field
- Plans that ignore slopes or tall grades from your latest site work
Catch these on paper to avoid expensive trench rework.
Anchorage climate notes: freeze–thaw and timing
- Spring thaw: soils are wet and fragile—protect trenches from collapse and keep equipment off soft ground.
- Summer: best window for excavation, tank setting, and field installation.
- Fall: button up grades and ensure outlets/vents stay above snow lines.
- Winter: limit exterior digging; focus on planning and indoor tie-ins if allowed.
For the dig-and-set portion, coordination with Trench Digging and Water & Sewer Line Repair expertise helps ensure inspections run smoothly.
How Excavate Alaska turns plans into working systems
- Plan-to-ground accuracy: we translate elevations into precise trench depths and slopes.
- Clean trenches and correct bedding: protect pipe grade and hardware.
- Drainage-first mindset: we shape the site so the system isn’t drowning from day one.
- Clear handoff: risers marked, inspection ports located, and a maintenance path you can follow.
Ready to break ground? Start a site review with Excavation Solutions and loop in Drainage Solutions where the lot stays wet.
FAQs
1) How do I know my plan is gravity or pump?
Check elevations: if the field sits higher than the tank, or the notes specify a pump tank and controls, it’s a pump/pressure system. Gravity systems rely on steadily sloping pipes.
2) What are tees vs. baffles, and do I need both?
They do the same job—keep solids in the tank and send clearer effluent to the field. Your plan will specify whether tees or built-in baffles are used; the key is proper orientation and maintenance access.
3) Can I drive over my tank or field?
Avoid it unless your design explicitly allows traffic-rated components. Heavy loads can crack lids or compact the drain field media.
4) Why are risers and filters called out?
Risers bring access to grade for pumping/inspection; outlet filters add protection for your field. Both reduce long-term headaches in Anchorage.
5) What happens if the pipe slope is off by a little?
Slight deviations can snowball into clogs or uneven distribution. Crews verify the slope during installation, and inspectors recheck it before backfill.

As the owner and founder of Excavate Alaska, I’m passionate about delivering reliable, high-quality excavation services to the Anchorage community and beyond. With over a decade of hands-on experience in the industry, I’ve built Excavate Alaska on the values of integrity, professionalism, and customer-first service. My team and I specialize in site preparation, land clearing, grading, trench digging, and full-scale excavation for both residential and commercial projects.